This post may contain affiliate links for products that I endorse and use. If you buy from one of the links, I earn a commission at no cost to you.
Canned vs fresh pumpkin pie. Worth it? Hmmm…
I’ve made lots of pumpkin pies in my life. But never with fresh pumpkin. Lots of reasons really. I don’t really like cutting up squash. How? Canned pumpkin is so easy. Time. I mean, every time I’ve made a pumpkin pie, I’ve had lots of other things going on, so who has the time.
So I recently decided to just make the time to do it. There was no pressure because I wasn’t making these for anyone else. Just fresh pumpkin pies.
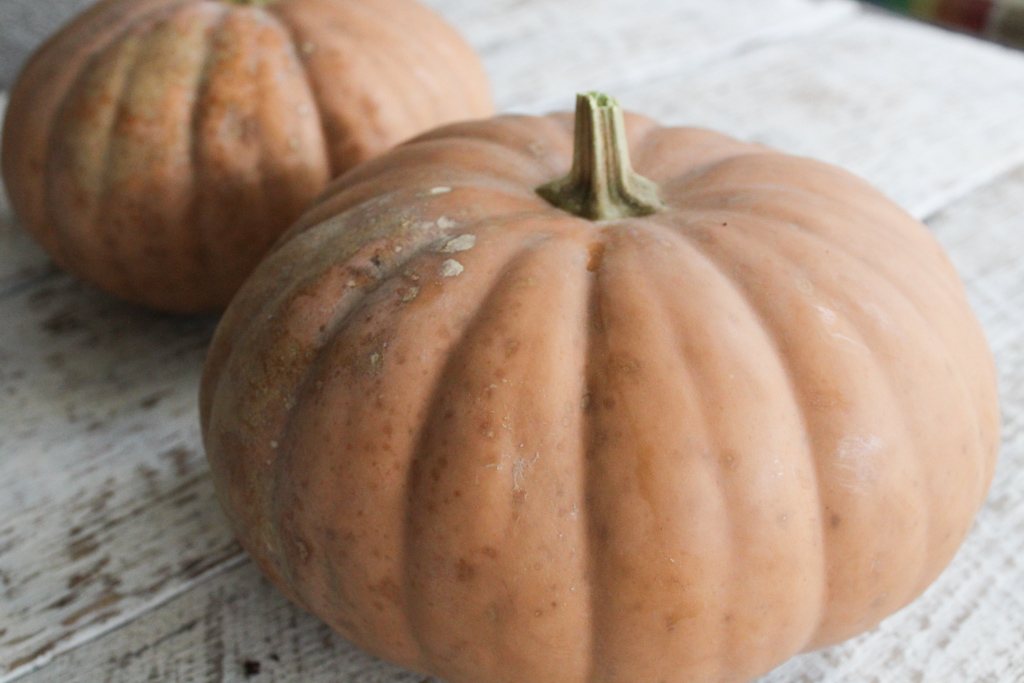
I got these two pumpkins in my last farmer’s market haul. They aren’t the sugar pumpkins everyone always says to use, instead, I got Long Island cheese pumpkins. I got the last two (I get to the market late!) and decided these were the ones.

First step, the pumpkins. They have to be roasted before anything else happens. Rather than trying to cut these in half, which again, I hate, I put them on a baking sheet and put them in a 350-degree oven for an hour and a half. Easy enough.
Right. Except that apparently cheese pumpkins (or at least mine) have a lot of water in them. So much so that I put them on the counter to cool, and came back with water dripping all over my floor. I’m still not even sure how that happened. After scooping all the guts out, I had more pumpkin than I thought I needed. In my internal canned vs fresh pumpkin pie debate, canned was winning at this point.
Next step, puree. One thing I’ve heard about fresh pumpkin pie is that there’s a texture issue, which obviously I didn’t want. So I pureed the pumpkin in a food processor for about 5 minutes straight and tasted along the way to sure it was as smooth as possible before moving on.
I realized after doing this that there was still so much water in the puree. So I plopped the pumpkin into a bowl with a strainer. After about an hour, I had almost 2 cups of liquid!
Now it was time to make the pies. I used my fairly easy recipe, which uses heavy cream instead of condensed milk, and I had — and I’m not making this up — exactly enough puree for two pies. So maybe one Long Island cheese pumpkin for one pie is the perfect ratio. Or maybe I just got lucky, but that’s what I had. So two pies it is.
The pie itself is as easy as mix, pour into crust and bake.
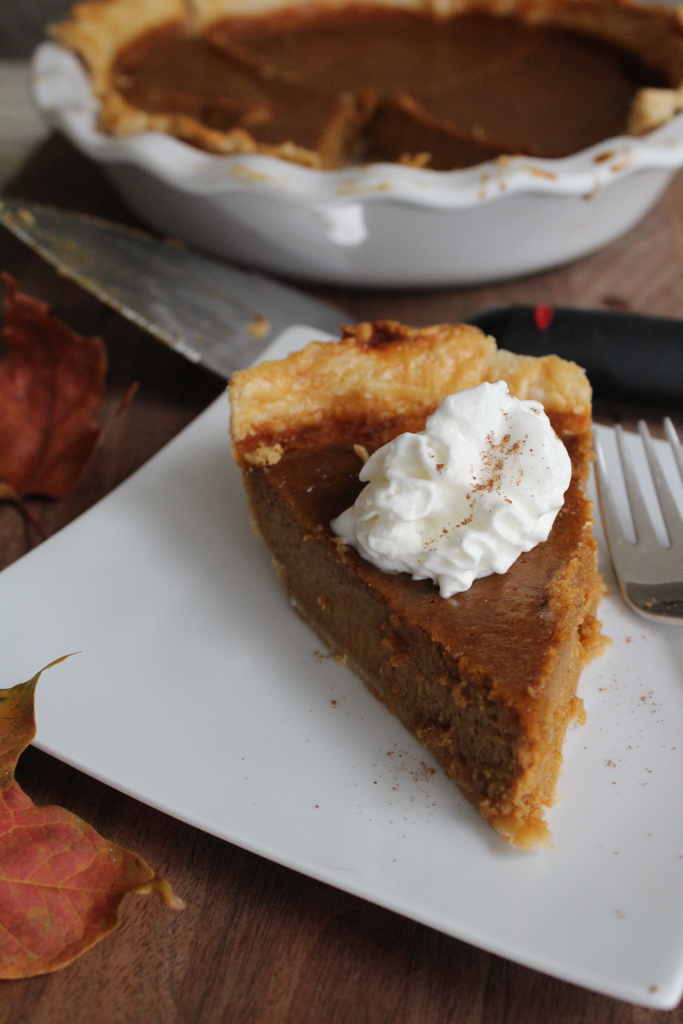
The result? Fantastic. Maybe among the best pumpkin pie I’ve ever made. I delivered pumpkin pie slices to several people that weekend and they all raved about it. But I make pretty good pumpkin pies, so I’m not sure that’s saying much. (Hint: Get a good pumpkin pie seasoning!)
Would I do it again? Maybe? If I was in the mood for pumpkin pies and a project, sure. If it’s the day before Thanksgiving and I have to take pies to my family, oh, and I also have to make mashed potatoes and cranberry sauce? No, definitely not. So, the chances of me making fresh pumpkin pies again are pretty slim. Canned pumpkin is so easy. And consistent. And did I mention easy? Because it’s so easy. And I’ve never ended up with pumpkin water everywhere.
Homemade Pumpkin Pie with Fresh Pumpkin
Pumpkin pie with homemade pumpkin is perfect if you want to impress holiday guests. Delicious, impressive, and traditional.
Equipment
- Pie dish
- Rolling Pin
Ingredients
Pumpkin:
- 1 3-4 pound pumpkin or squash I used a Long Island cheese pumpkin
Crust (makes enough for 4 single crust pies):
- 1/2 pound butter cubed and chilled
- 3 cups flour
- Pinch salt
- Ice water
Filling:
- 2 cups pumpkin puree from fresh pumpkin
- 3 eggs
- 1 1/2 cups dark brown sugar
- 1 tablespoon cornstarch
- 1 teaspoon kosher salt
- 1 tablespoon pumpkin pie spice
- 1 teaspoon cinnamon
- 1 cup heavy cream
- 1/4 cup whole milk
- 1 egg beaten with a tablespoon of milk
To serve:
- Fresh whipped cream
Instructions
For the pumpkin:
- Preheat oven to 350 degrees F.
- Put the pumpkin on a rimmed baking sheet. Grab a sharp knife and stab it a few times all over.
- Bake the pumpkin for about an hour. The skin should be very soft; you should be able to press into it with your fingers. If not, bake for 15 more minutes, and continue baking until softened.
- Remove and let cool completely.
- When it’s cool, cut in half and scoop out the seeds and membranes. Remove the flesh and transfer to a stainer.
- Let strain for about an hour.
- Transfer the strained pumpkin to a food processor and blend until very smooth. You want to taste the pumpkin as you’re blending so that you get it smooth enough. If there is any texture at all, keep blending — this graininess will be in your finished pies, so just keep blending.
- If your puree seems watery, transfer again to a strainer and let strain for a half hour or so. You don’t have to press it, but you want to get as much water out of it as you can; too much will affect both the taste and texture of your pie. Once it’s pureed and strained, it is ready to go in the pie.
For the crust:
- Put the butter in a food processor with the flour and salt. Pulse a few times.
- While pulsing, add ice water about 2 tablespoons at a time until a crust forms. Turn of machine and transfer to a floured surface.
- Press into a ball, cut into 4 even pieces, wrap in plastic. Put one in the fridge for your pie, and set the others aside for another use (they will freeze well.) You can also use one to decorate your pie if you have cookie cutters or mad decorating skills.
- Chill the crust for 30 minutes or so, remove and roll out to fit your pie dish.
- Preheat oven to 375 degrees F.
- Brush the edges of the crust with the egg/milk mixture. Add a piece of parchment to your pie dish with the crust in it. Fill with dried beans, rice, or my favorite — white sugar (the sugar will toast, and is great in almost any baked good you use it for!)
- Bake for 10 minutes.
- While the crust is baking, make the filling.
To make the filing:
- Whisk the pumpkin puree you made earlier with the eggs and sugar. Add the cornstarch, spices, cream, and milk. Whisk well until everything is combined.
- When the crust is done, fill it with the filling about 3/4 up. Bake for about an hour, until the edges are set and the center jiggles slightly. You can also test with a knife or toothpick — it should come out clean. You will likely need to cover the crust with a pie shield or aluminum foil to prevent it from burning about half way through baking time.
- Let the pie cool completely before slicing and serving with whipped cream if desired.
Notes
Storing leftovers: Pie crust can be made ahead, divided and frozen for another use.
Ingredient information: I used two pumpkins and got two pies. It worked out, but you never really know exactly how much puree you’re going to get out of one pumpkin, so I recommend either baking an extra pumpkin and saving extra puree for another use (good excuse to make this!) or grabbing a can of pumpkin puree and plan on using it to fill in if you don’t have enough.
Sourcing: I got my pumpkins at my local farmer’s market. If you get them at the grocery store, just don’t get the giant pumpkins normally used for carving.
Nutrition
Calories: 433kcalCarbohydrates: 55gProtein: 5gFat: 22gSaturated Fat: 13gPolyunsaturated Fat: 1gMonounsaturated Fat: 6gTrans Fat: 1gCholesterol: 127mgSodium: 422mgPotassium: 136mgFiber: 1gSugar: 41gVitamin A: 825IUVitamin C: 1mgCalcium: 84mgIron: 1mg
Tried this recipe?Let us know how it was!